Outlook 2007-2010 Setup
Automatic Configuration
The following will show you how to automatically configure your Outlook client. This should be fine for most email accounts. If you have a newer version of Outlook, the settings remain the same. The windows may look different. Contact us if you need more help.
If you need to manually configure your Outlook client (or need it to do "POP" access), go to Manual Outlook Configuration.
- Open Outlook. At the top click
File, then clickAccount Settings - Click
New.. -
Enter your name, email and password and click
Next.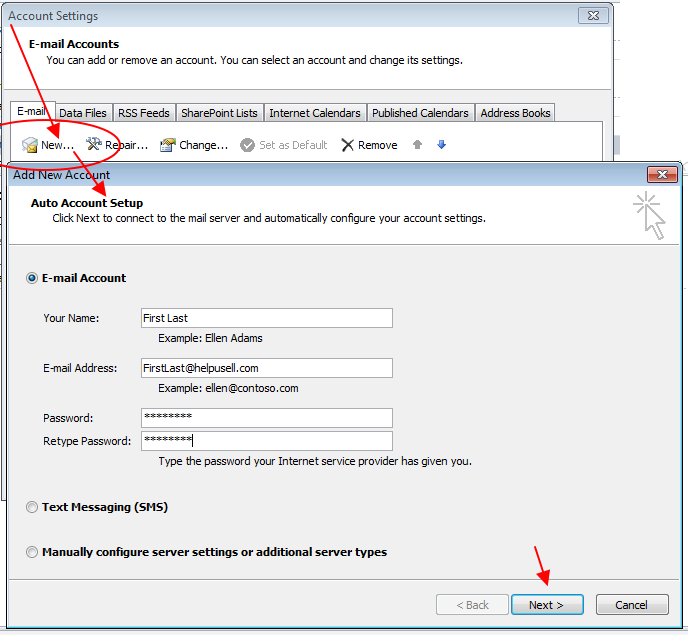
-
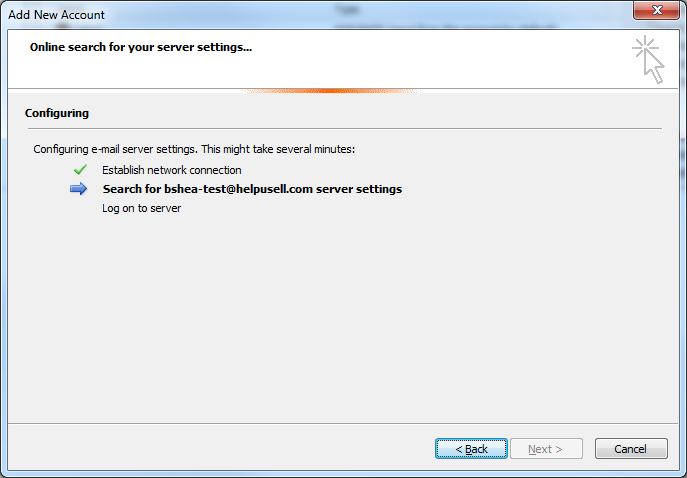
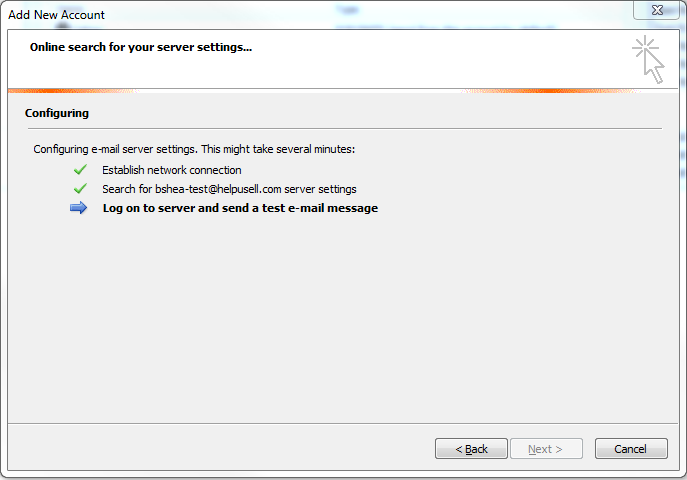
Outlook will proceed to talk to the server – this may take up to 2 minutes. (Usually around ~30 seconds.)
-
Once Outlook has configured itself against the server, just click
Finish.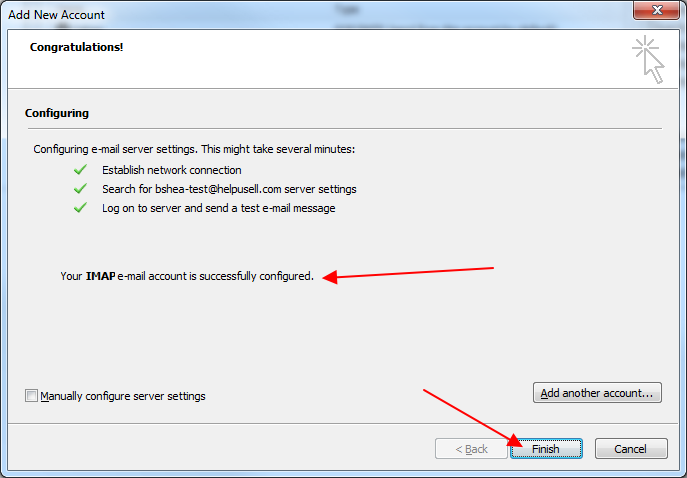
-
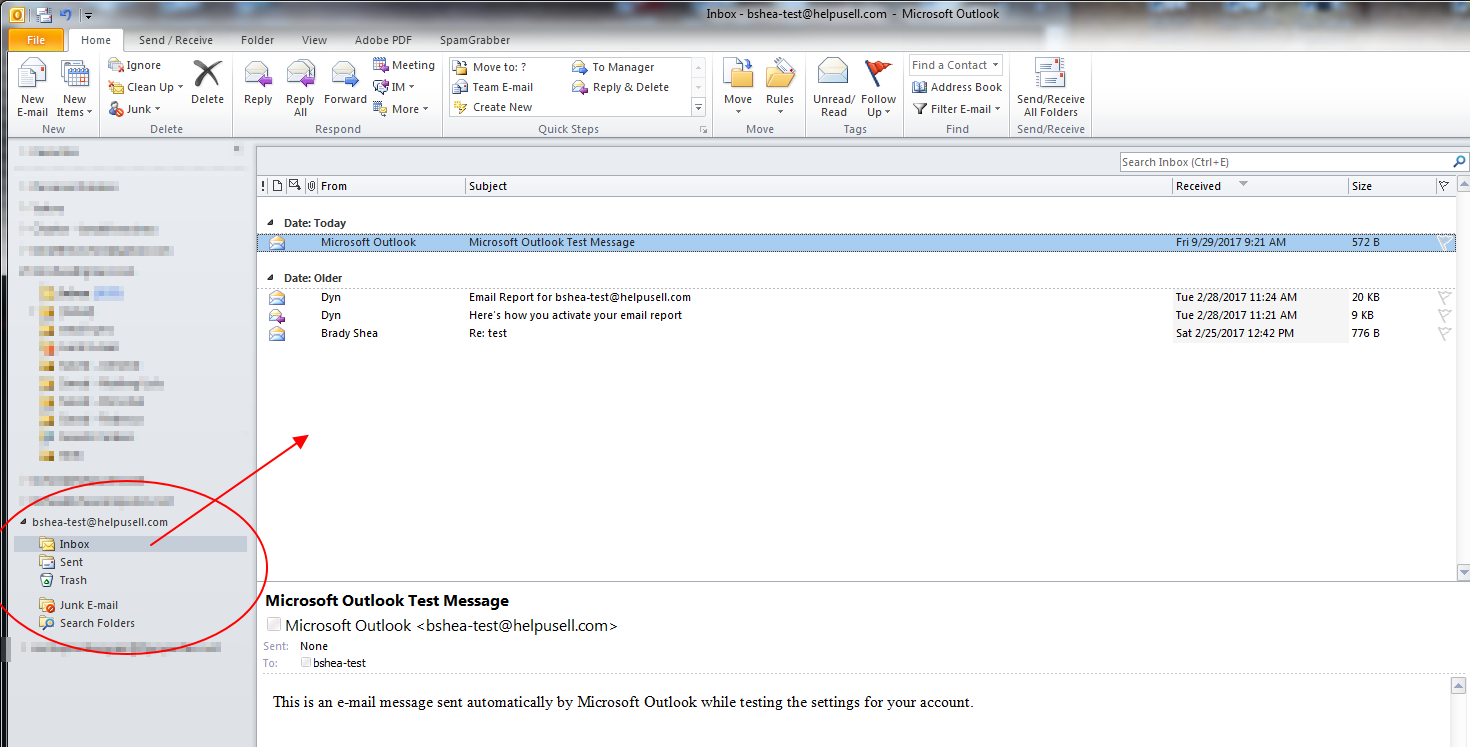
You’re all set! Once you click Finish, Outlook will put you in the INBOX of the new account.
If you see any problems, please report the error message given to support@helpusell.com and we will assist you.
Manual Configuration
The following is only if automatic didn't work for you, or you wish to fine tune any settings.
You may also be directed by Help-U-Sell Support to edit your settings.
- Open Outlook.
- At the top-left click
File, then clickAccount Settings - Click
New.. -
Click
Manually Configure Server Settings..and clickNext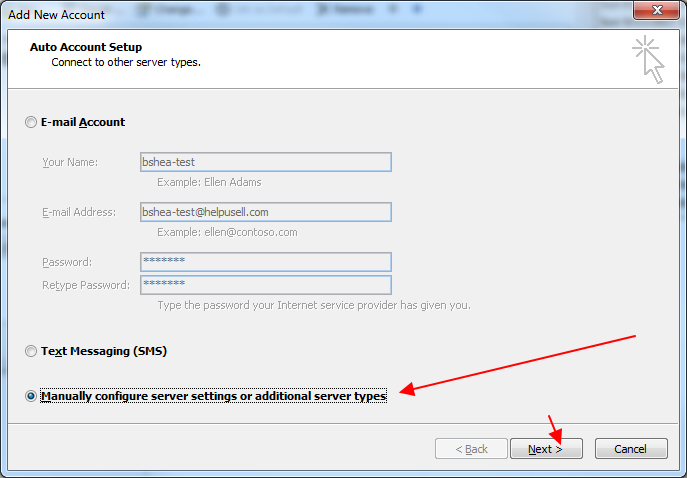
-
Select the
Internet Emailoption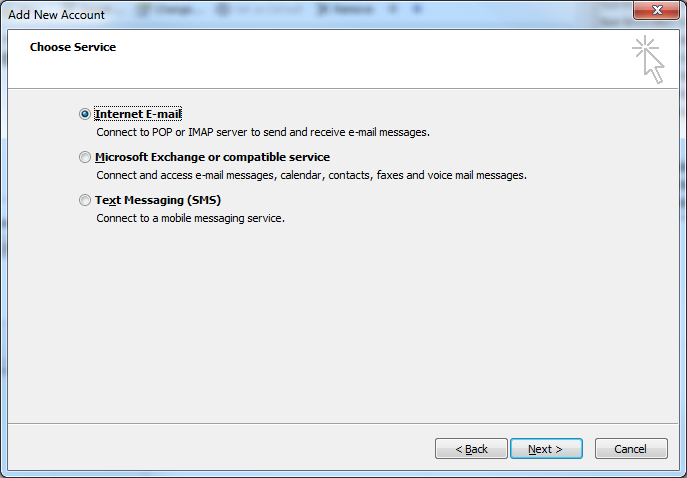
-
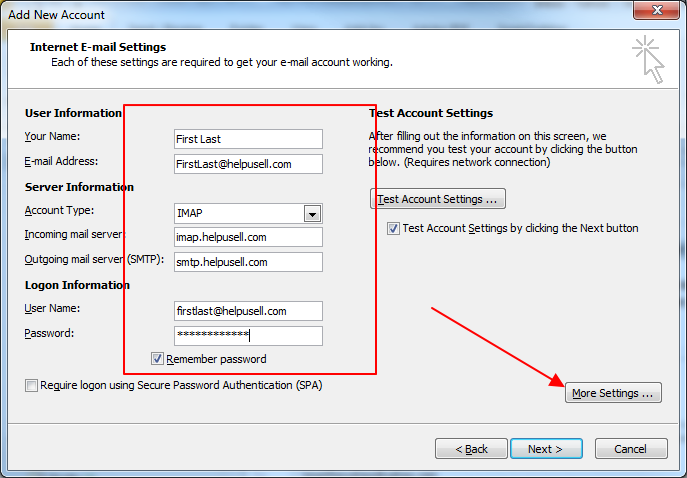
Enter
Your Nameand Help-U-SellEmail Address - Under
Account Typewe recommend usingIMAPunder a client like Outlook, though you may wish to usePOP - Under
Incoming mail server:enterimap.helpusell.comorpop.helpusell.comdepending onAccount Typeused - Enter
smtp.helpusell.comunderOutgoing mail server (SMTP) - Enter your Help-U-Sell Email Address again under
User Name: - Enter the Email Password you were issued under
Password: - Then click
More Settings..
-
Pick the
Outgoing Servertab and make sure the box is checked forOutgoing server requires authentication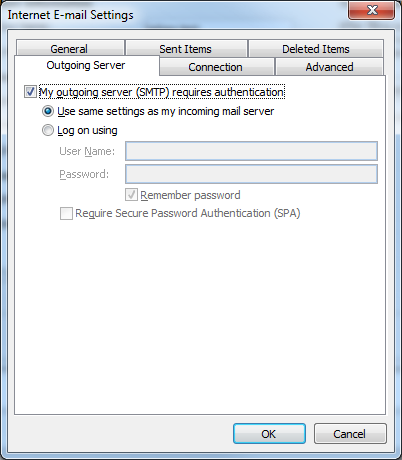
-
Pick
Advancedand fill out the 4 entries (be aware of what "Account Type" you picked earlier - IMAP or POP):- Under
Incoming Serverenter993in first dropdown andSSLin the second dropdown if you picked "IMAP" earlier - Under
Incoming Serverenter995in first dropdown andSSLin the second dropdown if you picked "POP" earlier - Under
Outgoing Server: Enter587in first dropdown andTLSin second dropdown (Preferred) - Optional SSL Port - Under
Outgoing Serverenter465in first dropdown andSSLin second dropdown
- Under
-
Click
OK.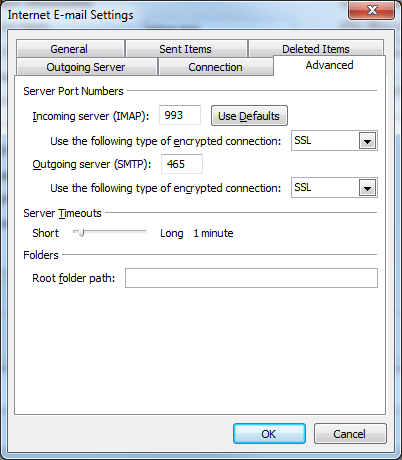
-
Your account is now correctly setup for use after you click
OKthenNext.
Edit Account Settings
For all versions of Outlook prior to 2016, you can just click File then Account Settings
Click once on the Help-U-Sell account in list. Then click Change...
You should now follow the guide above for your settings.
Outlook 2013
Please review Outlook 2007-2010 Setup above - the setup is basically the same.
You can also contact support for help.
Outlook 2016/Office 365
Please review Outlook 2007-2010 Setup above - the setup is basically the same.
You can also contact support for help.
Note for Outlook 2013/2016: To edit your HUS account settings if there is a problem (after account is added), you may need to access them from under the Windows Control Panel / Mail / Account settings AFTER closing Outlook. Once you are happy with settings and have tested them, save and reopen Outlook.
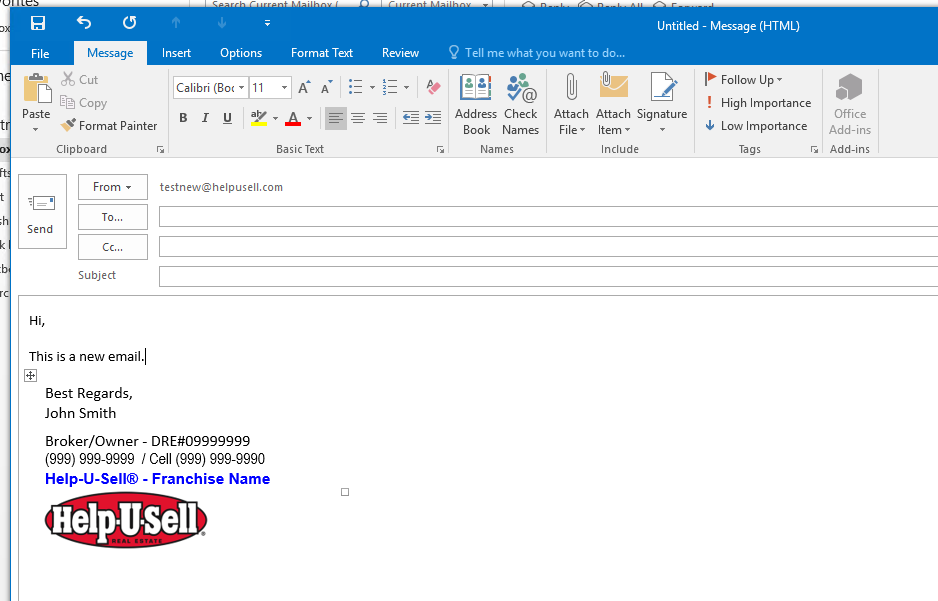
Outlook Signatures
Designing a custom signature
First, you want to design your signature. We recommend using Microsoft Word. This way you have a backup saved as well.
We will create a new signature using a table. A table tends to keep your signature formatted correctly no matter what is in the email.
-
Open Word and start a new blank document.
-
Near the top click
InsertthenTable. Pick the size you want. Example uses 5 lines (1 wide) by clicking the 5th box.
-
Now we want to make it smaller and hide borders. Right-click and pick 'Table Properties'.
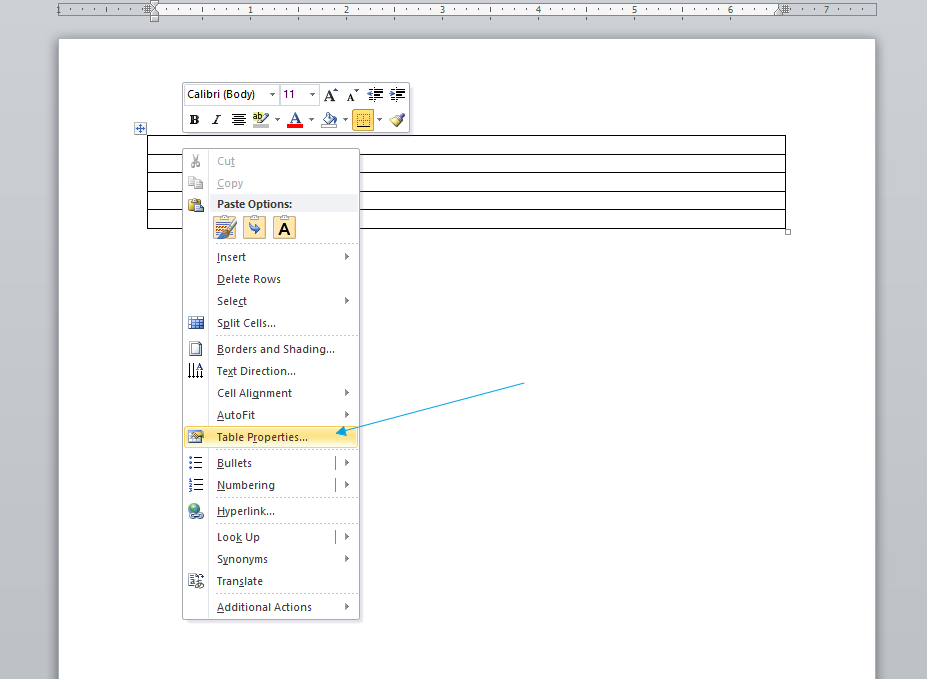
-
A new window opens. Pick
Borders and Shading...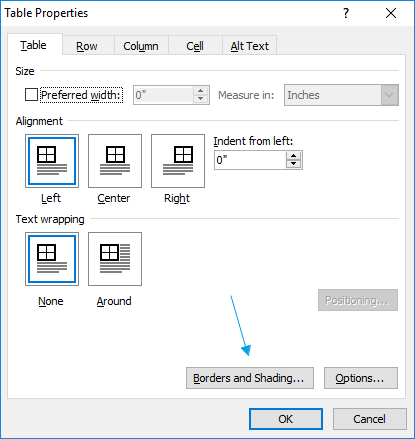
-
Another new window opens. At top right pick
None- make sure 'apply to table' is selected. Click OK twice.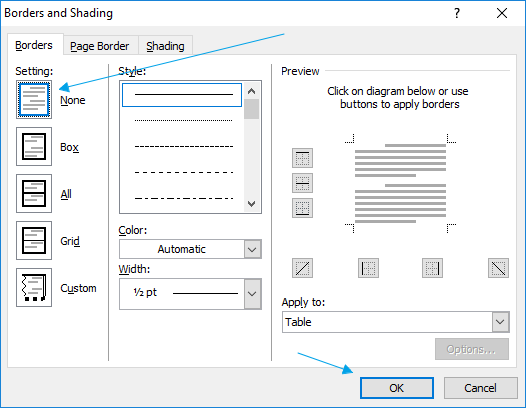
-
You should be back at the main document. On the far right of table, hover over the right margin of the table.
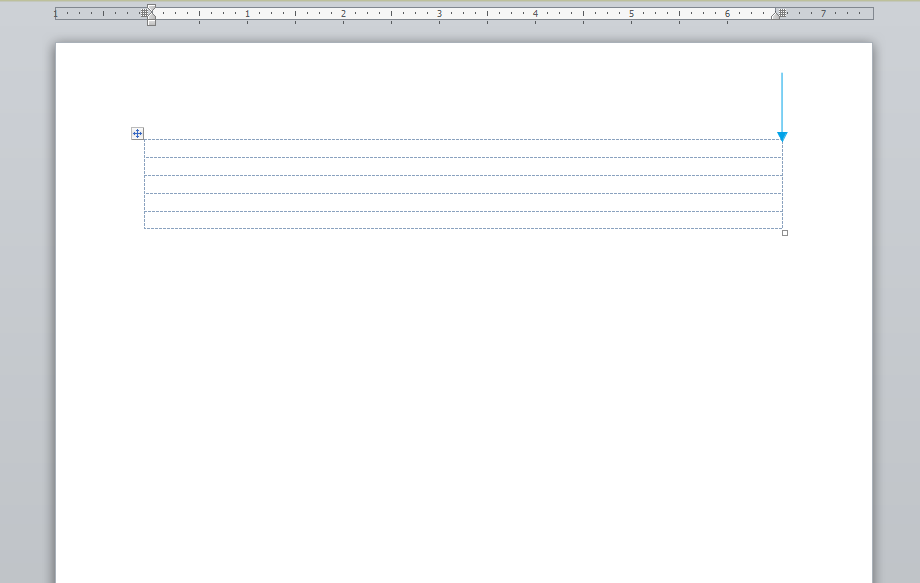
-
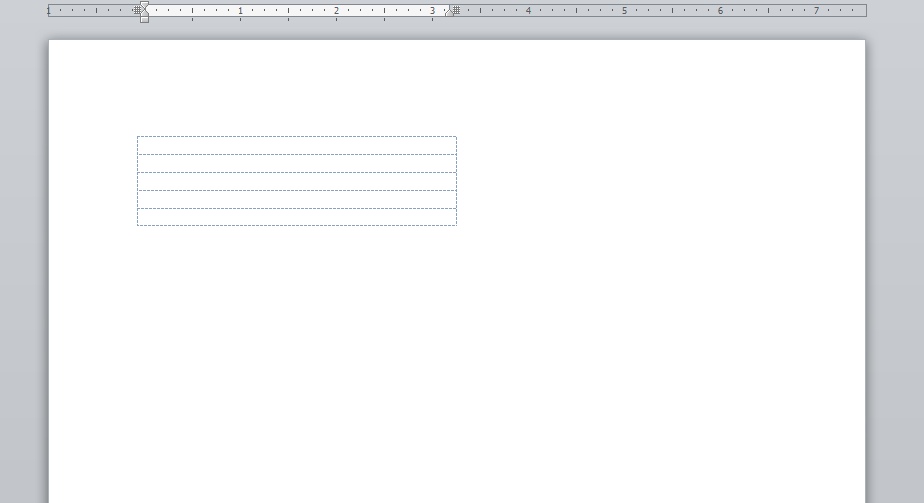
When mouse cursor changes, resize so you make the whole table shorter by moving the right margin to the left. It should take up about half the page now.
-
Now you have an 'invisible' table to use for your signature.
-
Start filling your table out with the pertinent information you wish to use in signature.

-
Note: We recommened not adding styles or links yet. Just fill in with text and a small graphic (if needed). (We can edit styles and any links later in Outlook.)
-
To add a graphic, first place cursor where you want it in signature. Then click
Insertand pickPicture. -
In this example, we are adding the main Help-U-Sell logo to bottom of this signature. If you wish to use this logo, copy and paste the following:
https://images.helpusell.com/logo2.pngin the file name field. ClickInsert.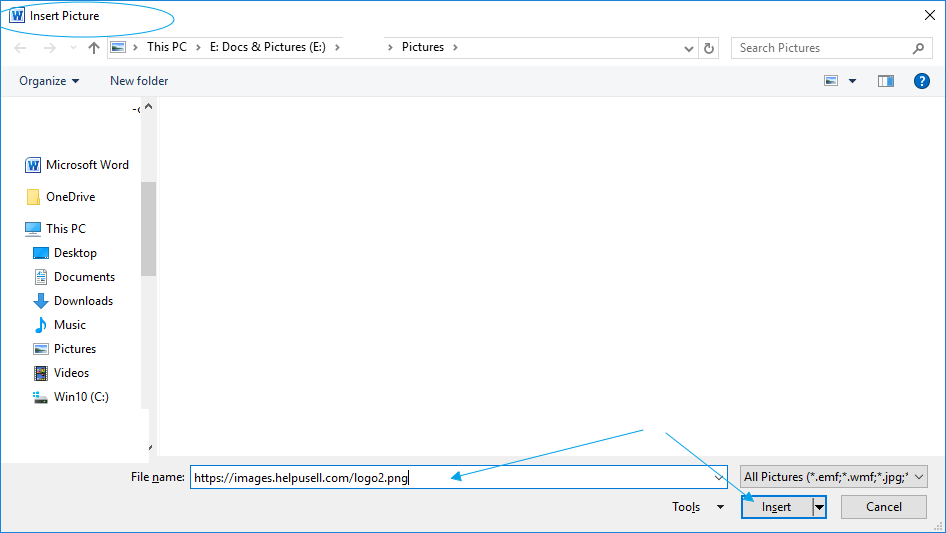
The image will present itself and allow you to resize it to your liking.
When you are happy with the basic look of your signature in Word save it.
You will want to copy and paste it into Outlook (Step #5 below).
Now you can proceed with adding a custom signature.
Adding a custom signature
-
Open Outlook. In Outlook click
FilethenOptions.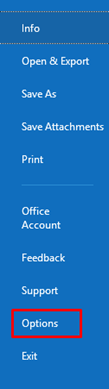
-
In new window on the left, click on
MailthenSignatureson right.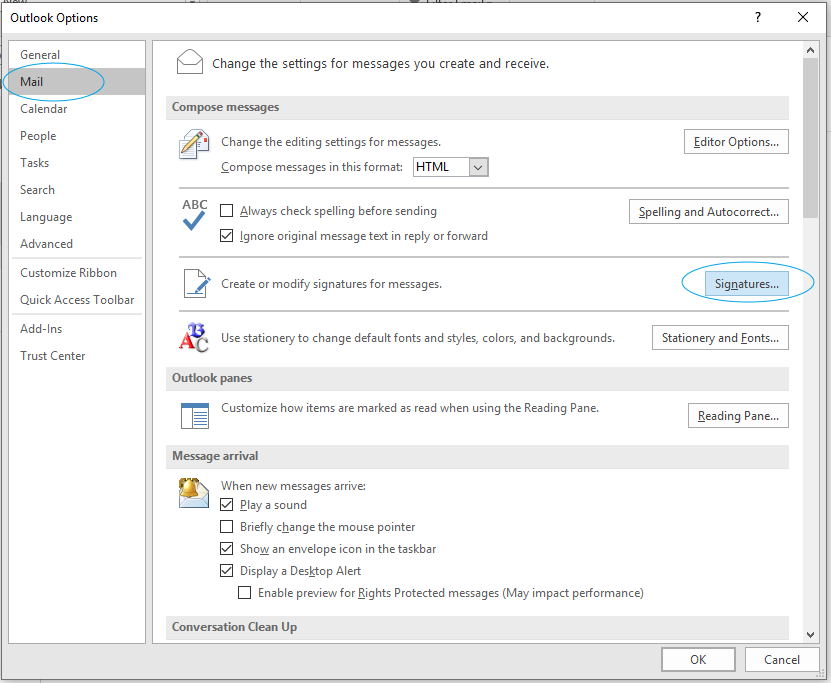
-
Click
Newand name your new signature then ClickOK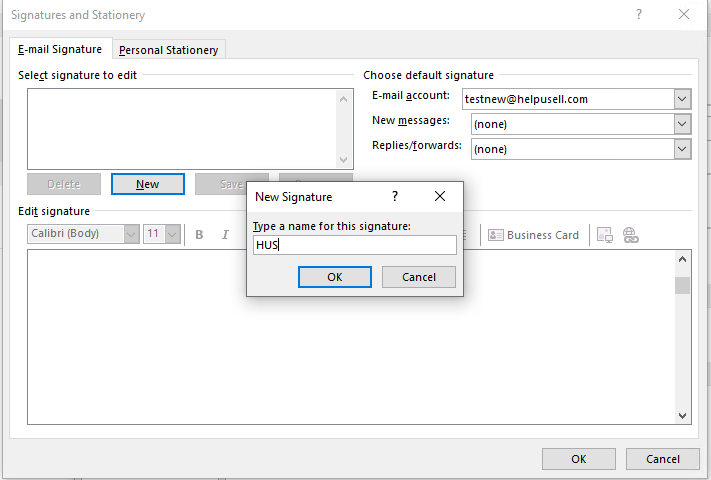
-
At this point you can either create it from scratch, or as we suggested above, use Microsoft Word.
-
If using the "Word method" above, highlight the signature in Word and then "Copy and Paste" (CTRL-C then CTRL-V) into the new signature area in Outlook.
-
Edit the signature styles, links and graphic to your liking now. Make sure you select the new signature as "New Message" and/or "Replies/Forwards".
Save
-
Test to make sure it works by starting a 'New Email'. You should see your new signature.